
How to Reactivate a Dry (Dehydrated) Sourdough Starter Recipe
Introduction
Reactivating a dry sourdough starter is a rewarding process that brings your dormant culture back to life. This guide walks you through the simple steps to revive your dehydrated starter, so you can bake fresh, tangy sourdough bread again.
Ingredients
- 1/2 tablespoon dried sourdough starter culture
- White bread flour or all-purpose flour (amount varies with each step)
- Filtered lukewarm water (non-chlorinated, avoid cold water)
Instructions
- Day 1: In a clean pint-size mason jar or similar container, combine 1/2 tablespoon of dried sourdough starter with 1.5 tablespoons of filtered lukewarm water. Let it sit for a few minutes to soften, stirring occasionally with a fork or spoon. Add 1 tablespoon of flour and mix thoroughly. Cover the jar to prevent drying and place it in a warm spot (70–75°F). Wait about 24 hours.
- Day 2: Add 1 tablespoon of flour and 2 teaspoons of water to the same jar. Mix well, cover, and leave at room temperature for another 24 hours.
- Day 3: Repeat the Day 2 feeding by adding 1 tablespoon of flour and 2 teaspoons of water. Mix, cover, and rest for 24 hours.
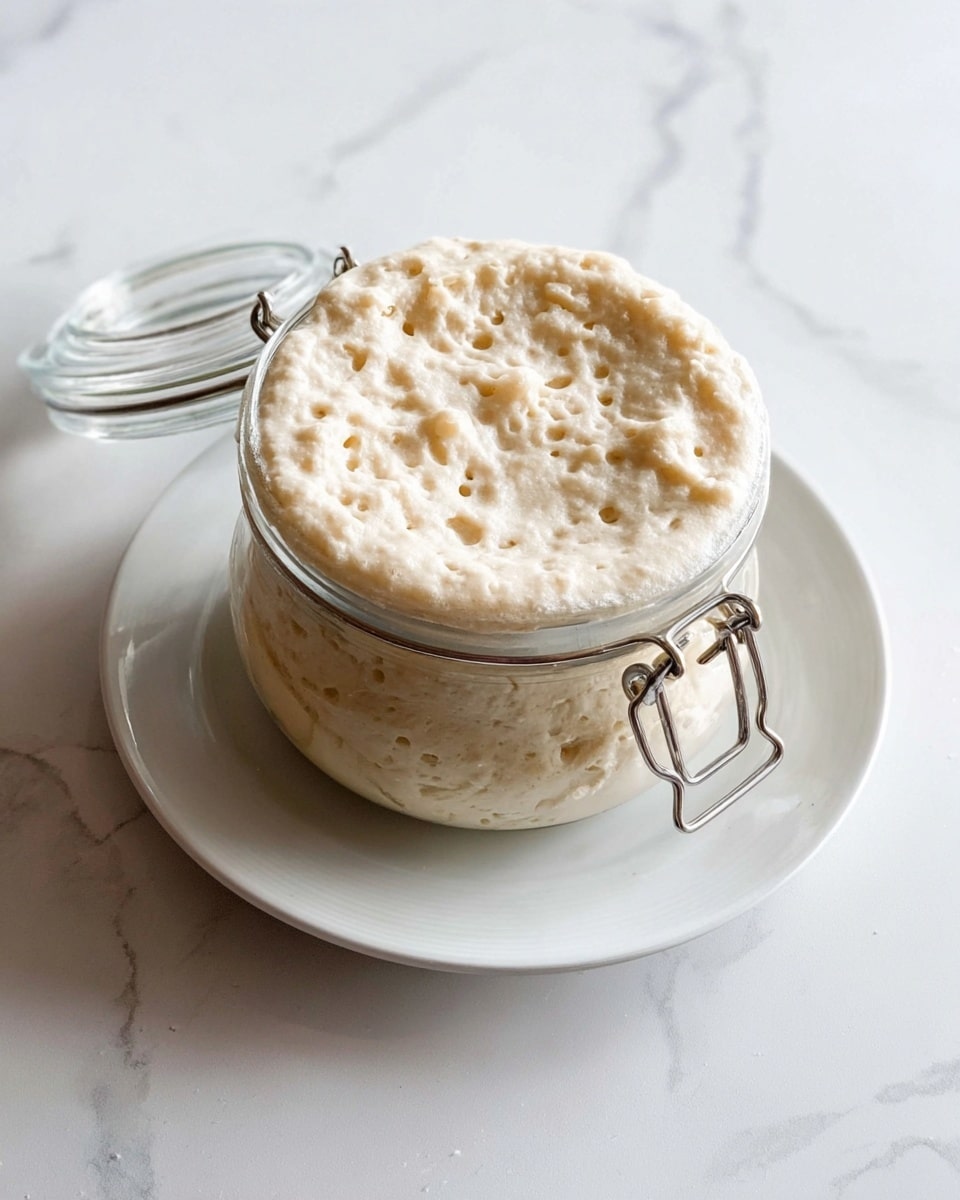
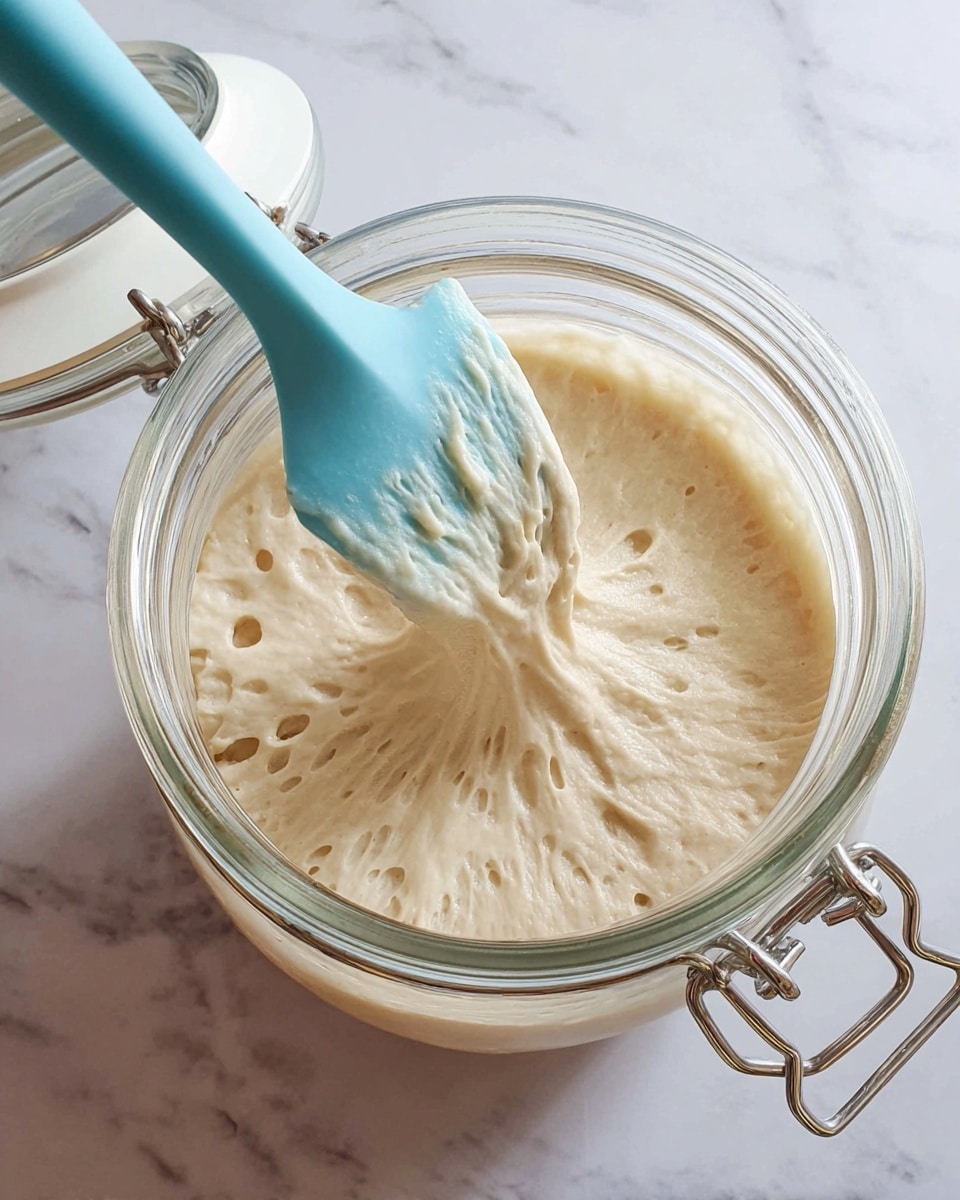
- Day 4: Add 1/3 cup of flour and 1/4 cup of water to the starter. Stir thoroughly, cover, and set aside. You may mark the starter’s level to observe rising activity.
- Day 5: Transfer the starter to a clean mixing bowl. Add just under 1 cup of fresh flour and 1/2 cup of water, mixing thoroughly. Move the starter into a larger container, such as a 1 to 2-liter glass jar, and keep it at room temperature. If it bubbles and rises noticeably, it’s active and ready to bake with.
Tips & Variations
- Use filtered, lukewarm water to avoid inhibiting yeast activity. Chlorinated or cold water can slow or prevent reactivation.
- Marking the jar with a rubber band or tape helps you track the starter’s rise and activity levels.
- Choose unbleached white bread flour or all-purpose flour for best results; whole wheat or rye can also be used for flavor variations.
- If your starter isn’t bubbling by Day 5, continue daily feedings until active.
Storage
Once active, store your sourdough starter in the refrigerator if not baking regularly. Feed it once a week to keep it healthy. Before baking, bring it to room temperature and feed it to reactivate activity. If kept at room temperature, feed the starter daily to maintain strength.
How to Serve
Serve this delicious recipe with your favorite sides.
FAQs
How do I know when my starter is fully reactivated?
Your starter is ready when it bubbles steadily, doubles in size after feeding, and shows a pleasant sour smell. This peak activity means it can reliably leaven bread.
Can I use cold tap water for reactivating my starter?
It’s best to avoid cold or chlorinated tap water as it can slow down or inhibit the yeast’s growth. Use filtered lukewarm water to encourage healthy activity.
Print
How to Reactivate a Dry (Dehydrated) Sourdough Starter Recipe
- Total Time: 5 days
- Yield: Approximately 2 cups of active sourdough starter 1x
- Diet: Vegetarian
Description
Learn how to reactivate a dry (dehydrated) sourdough starter with this step-by-step guide. Using simple ingredients like dried sourdough culture, flour, and filtered lukewarm water, you’ll revive your starter over five days until it becomes bubbly, active, and ready for baking. This method is perfect for bakers looking to bring an old or dehydrated sourdough starter back to life, ensuring a robust and flavorful base for all your sourdough baking needs.
Ingredients
Dried Starter Mix
- 1/2 Tbsp dried sourdough starter culture (powder or flakes)
Flour
- White bread flour or all-purpose flour (amounts vary)
Water
- Filtered lukewarm water (non-chlorinated, avoid cold water)
Instructions
- Day 1: Soften and mix starter
In a clean pint-size mason jar, combine 1/2 Tbsp dried sourdough starter powder or flakes with 1.5 Tbsp filtered lukewarm water. Allow it to sit for a few minutes to soften, stirring occasionally with a fork or spoon. Then add 1 Tbsp flour and mix thoroughly to achieve a smooth consistency. Cover the jar with a lid, beeswax wrap, or plate to prevent drying out and set it in a moderately warm spot (70 to 75°F). Let it rest for about 24 hours.
- Day 2: First feeding
Add 1 Tbsp flour and 2 teaspoons water to the existing starter in the same jar. Mix well to incorporate. Cover again and let it sit for another 24 hours at room temperature.
- Day 3: Second feeding
Repeat the feeding process from Day 2—add 1 Tbsp flour and 2 teaspoons water to the jar, mix thoroughly, cover, and let rest for 24 hours.
- Day 4: Larger feeding
Add 1/3 cup flour and 1/4 cup water to the starter. Mix well and cover again. Set aside at room temperature. Mark the starter level to monitor activity; it should begin rising significantly by now.
- Day 5: Final feeding and transfer
Transfer the starter from the jar into a clean mixing bowl. Add just under 1 cup fresh flour and 1/2 cup water, mixing thoroughly. Move the starter into a larger container (about 1 to 2 liters, such as a glass flip-top jar) which will serve as its permanent home. Keep it at room temperature. Active bubbling and rising indicate successful reactivation and peak activity; the starter is now ready for baking or refrigeration.
- Ongoing maintenance
Once your starter is active, continue regular feedings as needed. If unsure what to do next, store it in the fridge until you decide. Refer to detailed sourdough starter maintenance articles for guidance on feeding and storing to keep it healthy and vibrant.
Notes
- Use filtered, lukewarm water to avoid chlorine which can inhibit fermentation.
- A moderately warm environment (70-75°F) optimizes yeast activity and starter growth.
- Covering the jar prevents drying but allows some air exchange, which is essential for fermentation.
- Consistency should be thick but stirrable; adjust flour or water slightly if too stiff or too thin.
- Marking the jar helps track how much the starter rises over time, indicating its activity level.
- If the starter does not bubble or rise by Day 5, continue feedings for a few more days.
- Once active, maintain your starter by feeding regularly and storing in the refrigerator if not baking daily.
- Always use non-metal containers and utensils to avoid any adverse reactions with the starter.
- Prep Time: 5 minutes per day
- Cook Time: 0 minutes
- Category: Bread Preparation
- Method: No-Cook
- Cuisine: Artisan Baking
Keywords: sourdough starter reactivation, dehydrated sourdough, sourdough bread starter, how to revive sourdough starter, sourdough baking, homemade bread


